
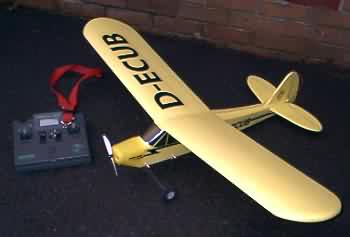
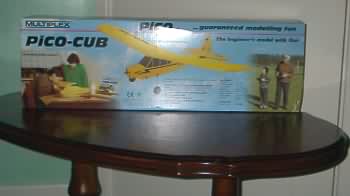
Multiplex Pico Cub
Everyone Seems To Have Twin Stars... I Wanted to Be Different!
 About two months ago, I noticed an advert for the Multiplex Pico Cub. The picture whetted my appetite and I was well and truly sold when I read that it took 600 mAh cells - a battery size that I already had.
The Pico Cub is a semi-scale model of the Piper Cub. Its moulded foam construction is in the same style as the Twin Star and Pico Jet, both of these models having proved very popular.
I purchased the kit from DW Models, my local Hobby store in Bridgend along with an extra Gunther propeller just in case.
Open the Box
 When I opened the box (which ambitiously tells you that the Cub can be built in three hours!) I was greeted with a large A3 sized Decal sheet and an instruction booklet.
Under these in "Cub Yellow" foam lay the two wing halves, fuselage moulding, rear turtle deck moulding and tail feathers.
A sheet of die cut wood parts for beefing up the airframe are supplied, along with plastic bags containing smaller items such as nuts and bolts, undercarriage struts/ wheels. The engine cowling is vacuum formed in yellow plastic.
A nice touch was that bowden cables for tail surface movement and a motor/prop combination are also included. All that needed to be purchased to complete the model was a speed controller, receiver, two micro or mini servos and battery.
Crunch!!
Unfortunately, on my kit, even with the added padding of bubble wrap, the tailplane had cracked somewhere between Germany and my workshop. A small amount of five minute epoxy and carefully taping down on a flat surface quickly remedied this.
Down to Work
The first job is to score the elevator and rudder hinges. I decided that it was easier to cut these off and hinge with diamond tape to give a straighter hinge line. Be sure also to cut the excess plastic off the rear wingbolt reinforcement moulding or it will not fit. The instructions omit to mention this, otherwise they are excellent.
Building the model is straightforward, however landing gear assembly is a bit fiddly unless you have an extra pair of hands. The wheels supplied are truly first class, with lightweight foam tyres.
After three evenings work I had the airframe completed and ready to install the radio components. Do fit the optional wing struts - as well as giving structural strength, they add to the look of the aircraft. I used thin ply embedded in the wing as anchors for the piano wire/pushrod clevis struts that I fabricated. These parts came from the spares bin.
Radio Gear
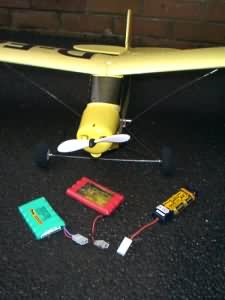
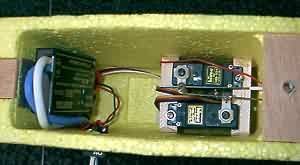 The model has been designed around the popular Multiplex "Einstein Brick" receiver/dual servo unit, but as I had two Hitec micro servos spare, they went in, as did a 30A rating speed controller - more than sufficient for a Speed 400.
I purchased a GWS four channel receiver. This little beauty is the tiniest receiver I have ever seen. It is advertised as suitable for indoor/park flier use and as the Pico Cub is only just over a metre wingspan I couldn’t envisage that I would be flying it at a distance that the GWS unit wouldn’t be comfortable with. Truly a snip at under �20!
Finishing the Cub
To finish the aircraft, the decal sheet was cut up and the aircraft decorated. Window decals need to be positioned as per the instructions, but you have carte blanche to fix the other stickers wherever you like - lots of scope for individuality.
At the end of the day you have an attractive semi-scale representation of one of the most popular aircraft ever built.
With an 8.4V 600AE battery connected, the cub weighs in at 780g. and balances right on the spar. Perfect.
OK, How Does It Fly?
First time out I had the services of an experienced clubmate who has flown electric as well as "wet" motors. With full throttle and an enthusiastic heave, off she went. Two clicks of left and one of up was all that was needed to trim the yellow ship as it climbed slowly towards the setting evening sun.
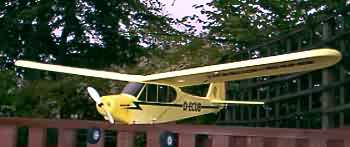 Left turn on the sticks and the Cub responds instantly. Around for a circuit and she settled in a nice stable flight at around thirty feet height, the dihedral in the wings making for very steady progress.
The speed was just as I expected - fast enough to keep you interested yet slow enough not to be intimidating to novices. After about four minutes I thought it prudent to bring the Cub down for it’s first landing. Lining up with the grass strip at about ten feet height I cut the motor and it glided gracefully in, hold the flare a bit for touchdown and… LOVELY... a perfect landing first time, the wire landing gear doing a great job of absorbing the bump.
Searching For More Grunt
 I wanted to try a 7.2V 1500mAh NiMH pack next, so this was shoehorned into the open battery bay on the bottom of the fus and taped for security. Again a hand launch was used to get the Cub flying. With this battery the Plane did not climb with the same authority as with the seven cell pack, but duration was greatly improved. An eight minute flight ended with another impressive landing, the dihedral again helping the Cub maintain a nice level, solid approach. With the aircraft safely back on terra firma an end was called to a successful first days flying.
Conclusions
The Multiplex Pico Cub is a quick to fabricate model that is aimed at, and would suit, the first time builder. Construction is straightforward with no previous modelling skills being required to produce an attractive, semi scale electric aircraft.
It is stable and flies relatively slowly, thereby encouraging the inexperienced flyer. It is not as fast or as aerobatic as it’s sisters, the Pico Jet and Twinstar, but fulfils it’s niche as an inexpensive introduction to electric flight admirably.
As with all other aspects of flight it is advised that new model pilots seek the skills of an experienced flyer before attempting to put this, or any, model in the air. Check with your local club.
Multiplex Pico Cub
- Wingspan: 46 inches
- Length: 31 inches
- Weight approx.: 19 oz
- Controls: Elevator/Rudder/Motor
- Power: Permax 400/6V motor