Flying
Bench Testing
Assembly was completed in three evenings. When the last
component was screwed in place, I connected up the battery, switched on
the Tx and… disaster
(well, almost)! The main rotors
immediately spun up and I watched in horror as the
Piccolo edged off the workbench with rotor blades
flailing and then fell in a heap of ball joints on the workshop floor.
Well much to my amazement nothing
broke – the ball links simply un-balled themselves.
The main problem was finding the rotor bearings which had
been flung to opposite ends of the workshop.
The cause was interference from a nearby fluorescent lamp. I learnt some useful safety lessons:
- Disengage the main motor pinion before your
first bench test. Do this by simply pushing the rotor head down
firmly, so the silicone sleeve slides up the shaft. Check the
sense of the throttle stick v. the Piccoboard, only then should
you re-engage the pinion.
- Always check your throttle lever is at low
throttle before you switch on
- Always switch the Tx on first!
Setting Up
Before the first flight, take a few minutes to
take stock of things and check your setup:
-
The swashplate must follow the
stick, i.e. forward on the stick and the swashplate tips forward. The
instructions are a bit vague about this, if you just follow your
aerodynamic instincts without taking into account gyroscopic lag,
your swashplate will end up 90 degrees out of phase. Been there,
done that!
- Balance the model fore/aft by holding
the rotor head with the rotors at 90° to the body.
Shifting the battery pack until it balances level.
- To start with place some balsa packing under
the left skid as recommended in the instructions, this makes
takeoffs much easier until you get used to the leftways drift. The
model must in any case fly with a slight right-side tilt to
counteract the sideways thrust of the tail rotor.
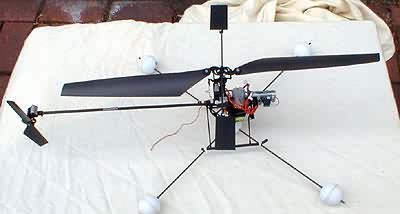
Note trainer gear - carbon rod and
ping balls. Canopy removed for first flights.
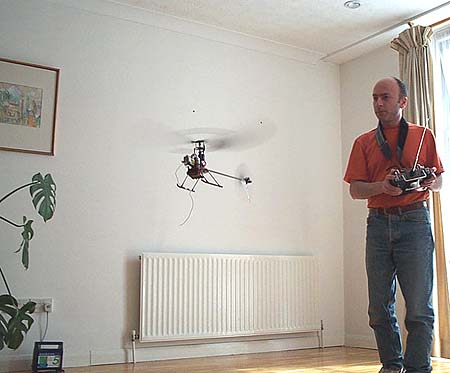
Test flights
My living room offered a suitable space about 12 ft * 15
ft with a wooden floor, and I would not suggest anything much smaller
than that. I spent the first "flights" just getting the trims and mixing
right without lifting off. Gradually the model started scuttling around
in ground effect, like a demented crab.
Fly, crash,
re-adjust, fly etc. was the order of the day for
the first several flights. However the model is
remarkably tough, the main rotor just flies apart at the
ball joints. Breakages are generally easily fixed with cyano.
Incredible really given the amount of punishment it's
received.
Gradually my flight times increased and confidence
grew, and I can now fly the model
quite comfortably in the living room including nose in, and slow
360-degree pirouettes in front of me.
Some tips:
-
During take off, get out of ground effect as
quickly as you can. GE extends to about 1 ft clear air below the skids.
-
Once in the air, adjust the trims so you can take your fingers off the
sticks for a second in the hover. If the model is nicely
trimmed hands off, it's a lot easier to handle.
- A little negative
exponential for pitch and roll controls
seems to makes the model smoother to fly.
Your mileage may vary.
- The main shaft has a
silicone tube retainer which can slip
following a hard landing - the shaft
should be checked after a hard landing.
Piccofly Simulator
The Piccofly simulator is a very
effective training aid which I strongly recommend
for rookie chopper pilots (see my review of
the Piccofly sim). With
the sim I was able to practice nose-in and
pirouettes without risking the model.

|