
Review: Enigma 60" EPP Pylon Racer
This article is kept here for interests sake, but it's pretty dated - it was written before the introduction of EPP pylon racing in 2000.
A good EPP backup machine comes in handy when pylon racing, so you can at least carry on flying after a prang. Let's take a look at the Enigma from Phoenix Model Products (UK). It's the right size, it's got a thin section, and it's made of EPP.
![]()
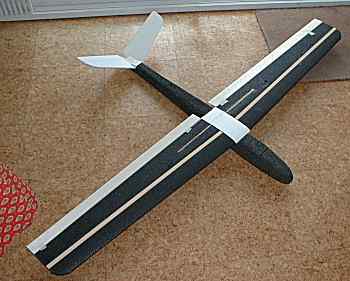
Enigma ready for launch
What You Get
- 2 x wing panels (black EPP)
- Correx for the V tail
- Ply and balsa parts
- Fittings (horns, hinges, control outers etc.)
- Cross weave tape for covering
- 1 x large tube Bostik contact adhesive
Not supplied: vinyl tape for UV protection - "Mr Phoenix" (Stan Yeo) can supply in colours of your choice. He can also provide a spray adhesive for the cross weave tape. You will also need to purchase some extra Bostik.
As befits EPP, construction is of the hack, glue and tape variety.
OK let’s get down to business...
Radio Requirements
You need one servo for the elevator and either one standard or two micro servos for the ailerons. Shell out on two servos if possible - saves fiddling with torque rods although these are supplied for masochists. The elevator servo needs to be small - preferably no taller than an HS80.
For Nicads, 2/3 AF size are a good fit. Available from Overlander or Phoenix. Alternatively you might be able to get away with two pairs of AA's one behind the other.
Don't be fooled by the external width of the fuselage - most of it is EPP and inside things are more cramped.
Documentation
Three A4 sheets contain instructions and drawings. The latter are not to scale and there are ambiguities both in the drawings and the instructions. However, most of it could be worked out, and a call to Stan sorted the rest.
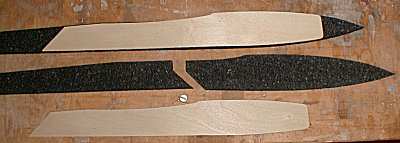
Building the Fuselage
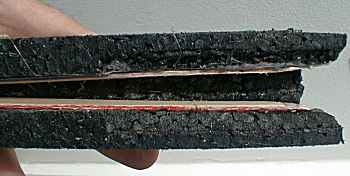
Each side is made up from two pieces of EPP stuck together and reinforced with 1.5mm ply doublers at each end.
Fus sides
The rear end acts as a platform for the V-tail. I made a slight mod here. In order to provide more room for the proposed internal elevator linkage (my mod, see later), I tapered the fuselage sides from the inside as in the photo below.
Tapered rear end (my mod)
Building the Wings
Wings are EPP and are nominally RG15 section. Nominally, because the RG15 trailing edge is notoriously thin. But it’s close enough.
Construction is straightforward - you stick the TE facing, let in the spars, let in the braces, then join the wing panels together. It all feels floppy at this stage but it'll stiffen up later when you apply the tape.
The spar slots were slightly tapered instead of being parallel, so I opened them out using a scalpel and a custom sanding tool as described in the instructions.
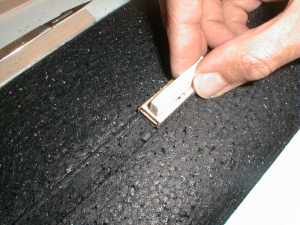
Opening out the spar slots
Bending loads are carried by ply and plastic braces, as well as some plasticard plates glued to the top and bottom skins. As a personal preference I'd prefer to see wooden braces all round and to his credit Stan is going to replace the plasticard front brace with a hardwood one in forthcoming kits.
If using servo mounted wings you'll need to make cutouts in the EPP. I stuck masking tape to the wing and drew round a servo to mark the outline. A scalpel was then used to cut a servo-shaped hole right through the wing, the waste pieces then trimmed to fit. A channel must then be scalpelled into the bottom surface for the servo leads which should lie flat in ribbon-cable fashion.
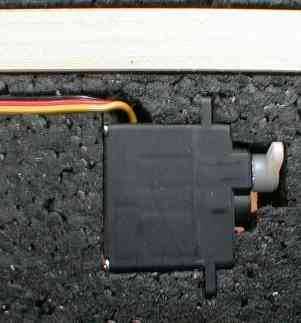
Wing servo installation
The ailerons are made of balsa TE stock and need a couple of passes with a razor plane to match the rest of the profile. I top-hinged them with vinyl tape although M&M strip hinges are supplied if you need to mid-hinge (e.g. if you're using torque rods). Plastic control horns are provided.
The wings are held on with rubber bands.
Buiding the Tailplane
The tailplane is from Correx, cut and bent in the middle. A pre-sawn balsa fairing is cyano'd over the break and provides the correct V angle.
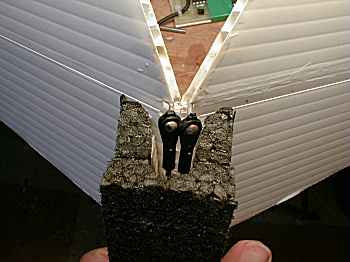
The suggested method for the elevator linkage involves external horns on the top of the elevators, plus wire-in-tube drive. I didn't like this at all, as the linkage seemed to be quite stiff. It was therefore replaced in favour of a torque-rod/ball-link setup as per the Eliminator. The torque rods were glued into the root of the elevators using epoxy/microballoons paste and are very secure. In the second photo below, you can just see the epoxy mixture in the flutes of the Correx.
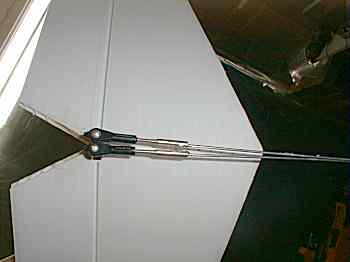
Internal linkage mod
This mod does need more depth at the rear of the fuselage for the ball joints. I dealt with this by heating up a length of copper pipe over a gas flame, and using it to melt the foam on the inside of the rear fuselage – giving a nice round section in the process.
Rear fus with extra depth
The mod reduces drag, slop and friction is definitely worth the effort unless you're extremely lazy or completely ham-fisted...
In fact, with the tubes running internally it would be easy to install a second servo thus allowing rudder and elevator controls (assuming transmitter mixing of course).
Covering with Tape
The model is covered with the supplied cross weave tape. The designer recommends that two thicknesses of tape be applied over the plasticard centre section "skin" with a good overlap onto the rest of the wing.
Airframe ready to cover
To protect the tape from the effects of UV it’s essential to apply a further covering of vinyl tape over the cross-weave. Use it as an excuse to add some colour! Vinyl tape is not included but Phoenix can supply.
Installation and Setup
The test model used
- 2 x HS81’s in the wing
- HS80 in the fuselage
- 450 mAh Nicads (2/3AF size)
- Micron Mini Rx
I used my Multiplex 3030 transmitter with V-tail mixing for the stab, and a user-defined mix for snapflap on the ailerons.
Six oz of lead was required to get the CG to the required 80mm position. Total weight was 34 oz. The model can be ballasted up to about 3 lb.
Flying
First flight took place at the Beacon in a moderate Westerly. Perfect conditions!
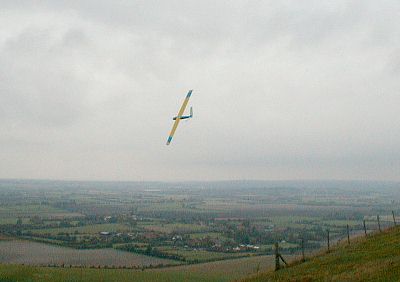
Showing poise
One session and several landings and adjustments later, I can say that the Enigma is very chuckable and free of vices – I found myself doing things closer to the deck than I’d ever dream of with my non-EPP machines.. it really does encourage expermentation.
So the first thing I did was experiment with snap-flap – this can make a big difference to the turning radius so it’s worth playing with if you intend racing or tight aerobatics.
Roll rate is good. Ailerons seem to work well even at low speed, you can pick up a wing if you do something silly.
Inverted is easy-peasy, just a slight forward pressure on the stick is all that’s required. Similarly with inverted stall turns and bunts. Inverted flight is really relaxed!

Inverted flight
Tightish loops no problem with snap flap.
Stall turns – very good considering lack of rudder. Try this - up into a stall turn, do a 180 at the top, come down inverted, do a low pass inverted and repeat at the other end to come back the right way up...
So what of pylon performance? Well I don’t know because I haven’t raced it yet. It feels good in the turns but it’s not as fast in a straight line as the Eliminator. But in my book the point of the model is as a backup rather than an out and out winner.
One note of caution: the recommended CG makes it pretty neutral in pitch, so don’t be tempted to skimp on the noseweight for the first flight.
As for crash resistance, I decked it twice through over-exuberance - including a cart-wheel. And guess what? No damage!!!
Verdict
Surprisingly perhaps, in view of its tag as a pylon racer, the Enigma's strength is as an aerobatic fun machine. If you want to go full-house, then reduce the V dihedral to 110 degrees, put in an extra servo for rudder and have yourself a ball…
In Pylon trim, all things being equal it's no match for a good composite racer, but it’ll enable you to carry on flying should you mid-air your prime time machine - which is just what I want.
From a personal point of view, EPP construction in general is a chore to be got over as quickly as possible! However, it's the end result that counts and even after a short acquaintance it's clear the Enigma is both relaxing to fly, aerobatic, and - most important - great fun!
Specs
| Model | Enigma 60" |
| Manufacturer | Phoenix Model Products |
| Price | See Phoenix website for latest prices |
Links
Acknowledgements
Thanks to Phil Marsh for clicking away on the digital camera.