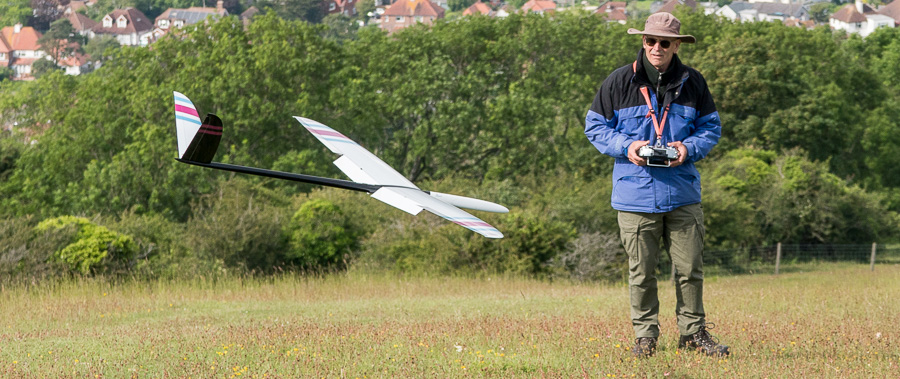
Crow brakes in action (Freestyler VI, pilot Mark Redsell)
How to program crow brakes
Introduction
Crow brakes (also known as 'butterfly') are a really cool feature on full house sailplanes. In this article, I'll explain what they are, and how to program them.
Why crow brakes?
Crow brakes are used to control a glider's rate of descent. At their heart they're very simple: the flaps go down and the ailerons go up, adding drag and making the glide path steeper. Unlike elevator, crow brakes have a minimal impact on airspeed - this makes them perfect for controlling the landing approach.
Crow brakes do, however, come with an unwelcome companion, namely a nose-up pitching moment. Fortunately there's an easy remedy, which is to mix in some down elevator or 'compensation'. The more crow is deployed, the more down elevator is applied.
A crow mix therefore requires one input (your crow lever), and five outputs - two for the ailerons, two for the flaps, and one (or two if it's a V-tail) for compensation.
The Butterfly mix
Ethos offers a mixer for crow brakes, and it's called 'Butterfly'. The input source can be any stick or slider. The outputs are the flap, aileron and elevator channels.
The Butterfly mix provides a solid foundation for your crow setup, but there's still some work to do. The following sections explain what's needed…
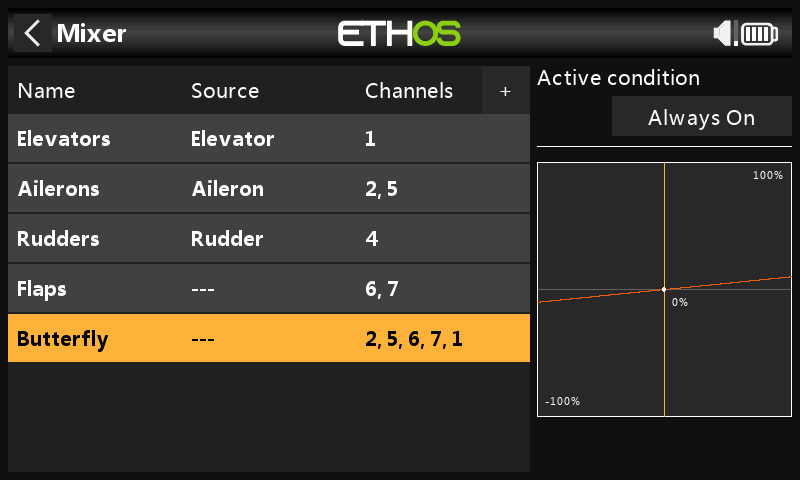
Butterfly mix with five outputs
Configuring the input
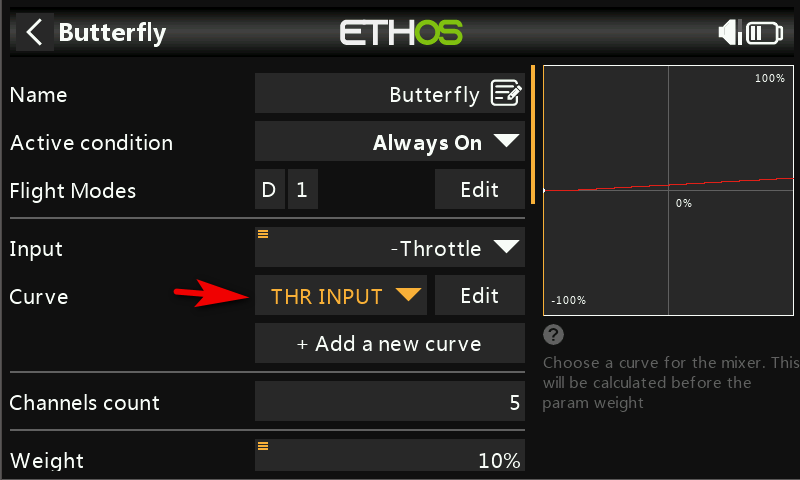
When configuring the Butterfly mix, it's helpful to consider the input and outputs separately. Let's deal with the input first. As an example, we'll control crow brakes using the throttle stick.
Assign the crow control
The first step is to open the mixer editor, and set the input to Throttle.
The default input curve
That's not all, though - we also need an input curve. The job of the input curve is to transform throttle stick values (-100% to +100%) to crow values (0% to 100%).
In fact, Ethos creates a curve for you. The curve is hidden and cannot be edited. However, you can see its effect on the graph on the mixer page. The graph slopes from zero at one end to some positive value at the other.
Reversing the throttle stick
The default curve assumes that zero crow is with the throttle stick fully back, in other words the opposite of the way most pilots work. You may therefore need to reverse the input. To do this, long press (~2 seconds) on the orange square in the Input field and choose 'negative'.

Butterfly mix with throttle source (note negative throttle input, see text).
Adding a deadband curve
The default curve works okay, but it's a little crude. Generally, it's a good idea to have a little stick deadband at the zero end - this prevents accidental deployment if the stick slips a little from the end stop. Fortunately, we can override the default (hidden) curve with our own custom curve.
Start by creating a 3-point deadband curve called 'THR INPUT'. Untick 'Easy Mode' (so you can edit the x values). Finally, set the points to (-100, 0), (-80,0) and (100,100).
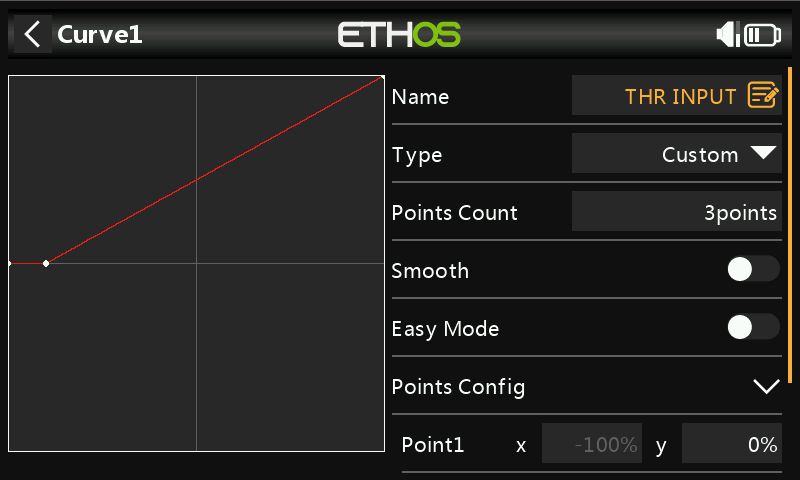
Deadband curve. Easy Mode is disabled to allow custom x-values.
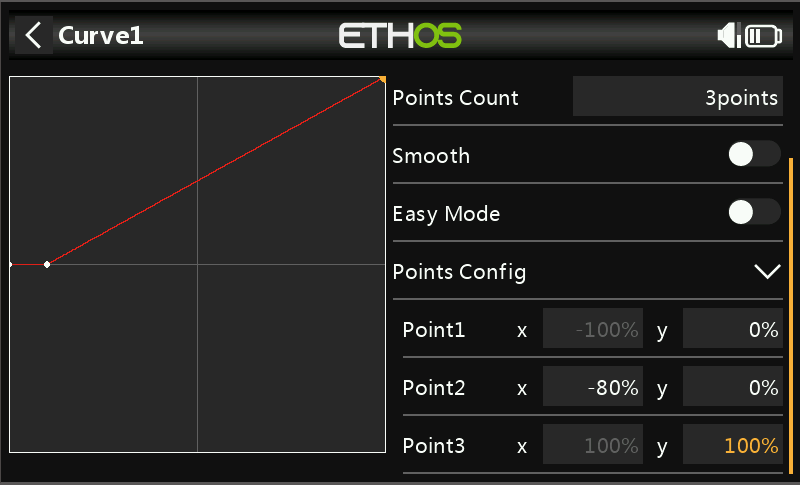
Deadband curve showing curve points.
Butterfly mix with custom deadband curve.
Configuring the ailerons and compensation
With the input done, we can turn our attention to the outputs.
Before proceeding, please calibrate the flap travels. This is done in the Outputs menu. Adjust Min and Max for equal left/right end points. Set Subtrim midway between Min and Max, and fine tune to equalise left/right. Then use Ethos' Servo Balancer feature to fine tune the responses. (Note: the Pro templates use a different technique based on a special CAL flight mode).
The aileron travel and crow compensation are straightforward — apply full crow, then adjust the weights of the aileron and elevator outputs to achieve the required movements.
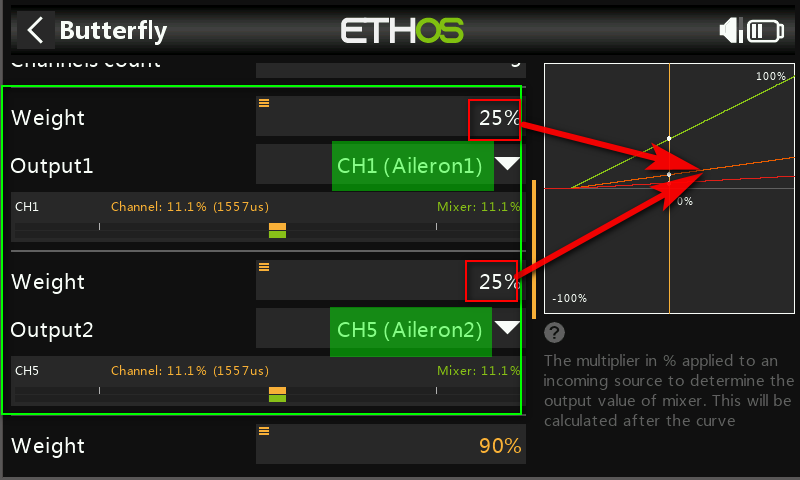
Aileron outputs
Configuring the flaps
The flaps require a little more work. This is because flap travel is normally asymmetric, with a large downward deflection and little if any upward motion. With the servos in the centre - as will occur with the flap mixers disabled - the flaps will naturally fall at around 20 or 30 degrees below airfoil neutral.
Clearly we must counteract the droop! So how do we do this?
The wrong way
First of all, do not try adjusting Subtrim to bring the flaps to neutral. Doing so will build in a large amount of differential into the servo response.
Second, do not try and build an offset into the Butterfly mix - if you disable the Butterfly mix then the offset will no longer be active and the flaps will droop again.
The right way: using an Offset mix
The correct way to counteract the droop is to create a separate Offset mix. Its job is to permanently bias the servo arm position. The mixer parameters should be as follows:
- Mixer type = Offset
- Name = "Flap offset"
- Active condition=Always on
- Flight modes = All modes
- Offset={adjusted, see text}.
- Channel count=2
- Output channels={flap channels}
Before calibrating the offset, ensure that all mixers affecting the flaps - including Butterfly - are in their idle position. This will drive the servos to their centre position, and you should see the flaps droop by 20-30 degrees. Now increase the offset from zero until the flaps line up with the airfoil neutral.
The offset must be finalised before configuring the flap travel.
Offset mix, with offset set to 27%
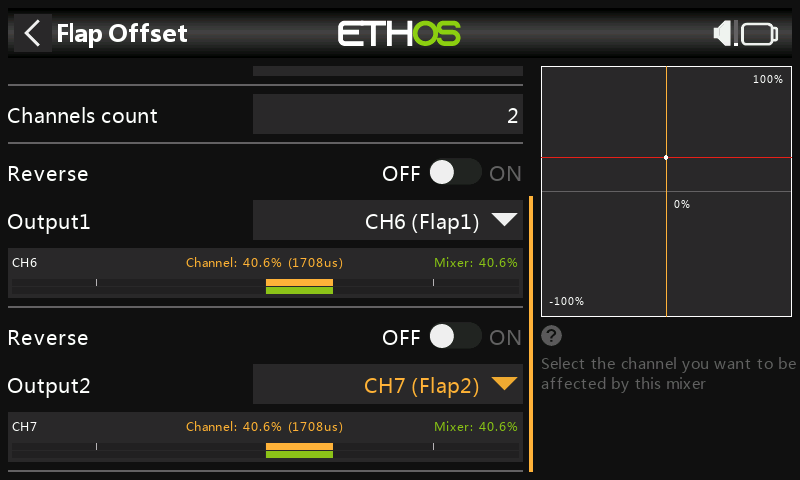
Offset mix showing flap outputs
Setting the flap travel
With the offset mix finalised and adjusted, we can return to the Butterfly mix for the final task, which is to adjust the flap travel. This is done by adjusting the weights of the flap outputs. Adjust so that with full crow, the flaps deflect by 60-85 degrees.
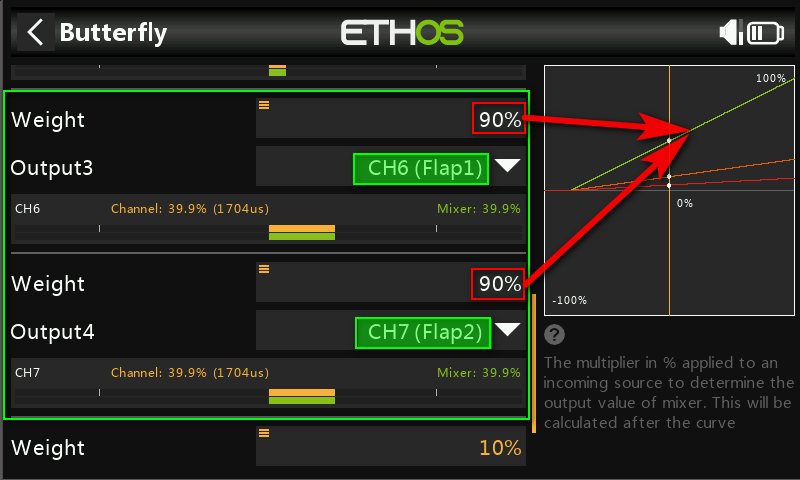
Butterfly mix showing flap outputs
De-activating crow brakes
By default, the crow mix is 'always on'. However many pilots like to disable the crow function during normal flying. This is easily done by setting the active condition to a switch.
With crow disabled, the flaps will go to the correct flap neutral position, thanks to the offset mix which we created earlier.
Refinements
Refinements you might want to add:
- In flight adjustment of elevator compensation
- Compensation curve
For now, I leave these as an exercise for the reader.